

Creating a Swift UI View in AR - xCode Tutorial for Intractable AR Menus


Hey All, technology is a fast evolving beast that can never truly be kept up with. So our job as developers is just to try our best to keep up. Today lets make an attempt to keep up with technology. Inspired by this medium article and the great tutorial written by Sarang Borude lets try and make our own version of the Swift UI view inside AR but we will play a video instead. You can follow along with this GitHub repo URL as well
To begin with lets create an xCode project with the following settings:
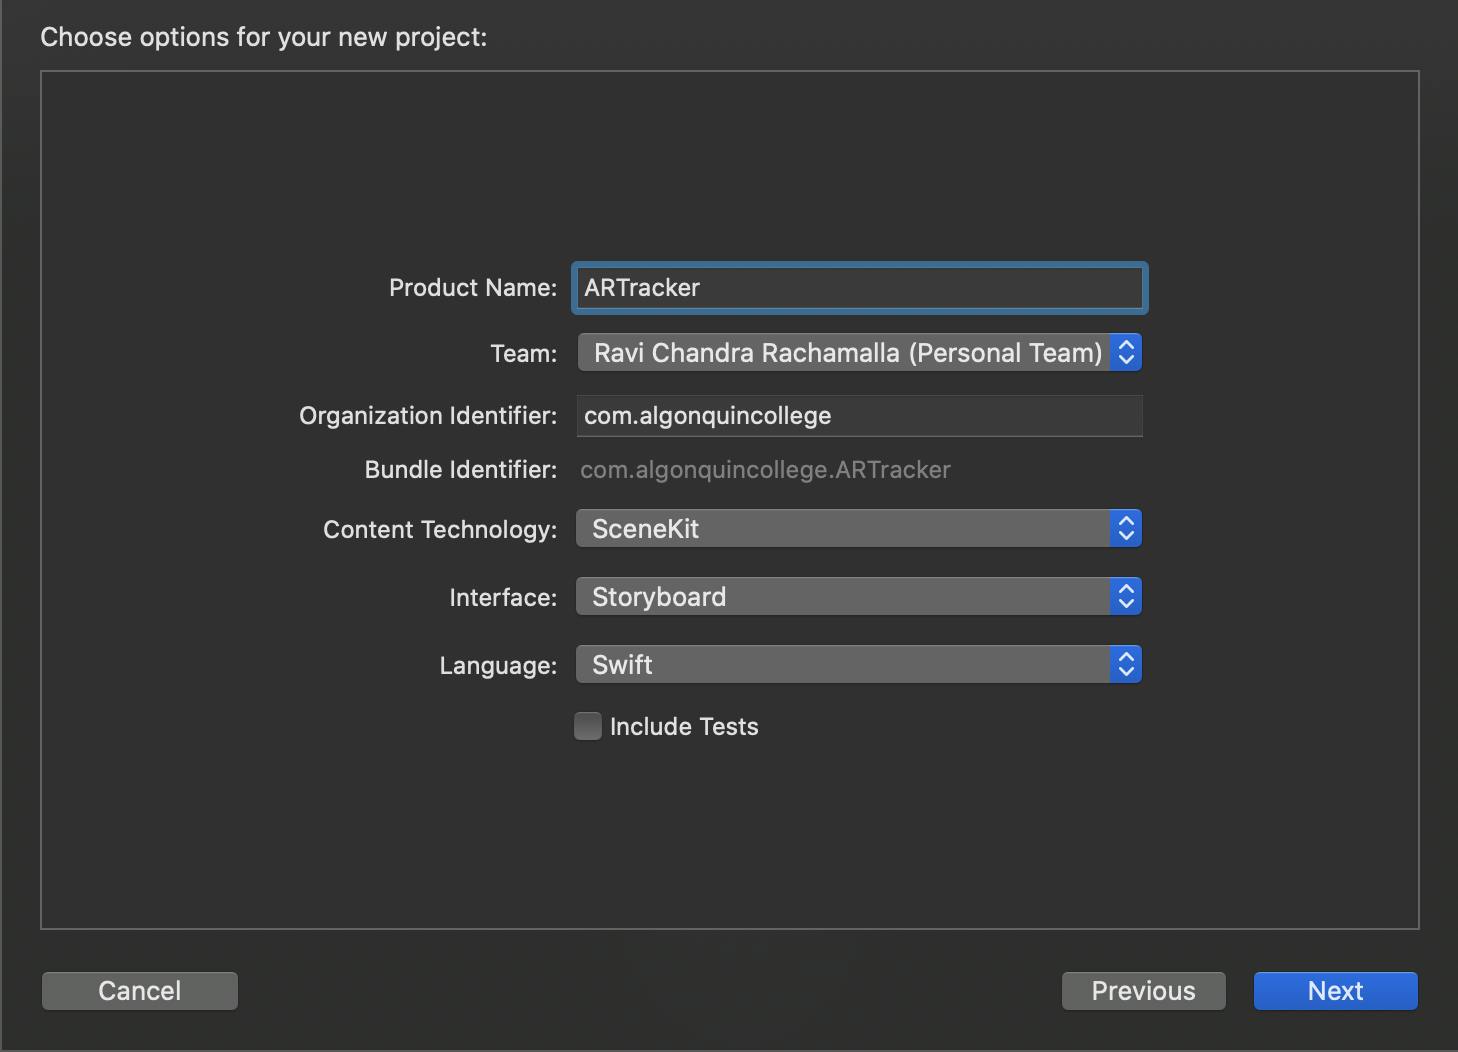
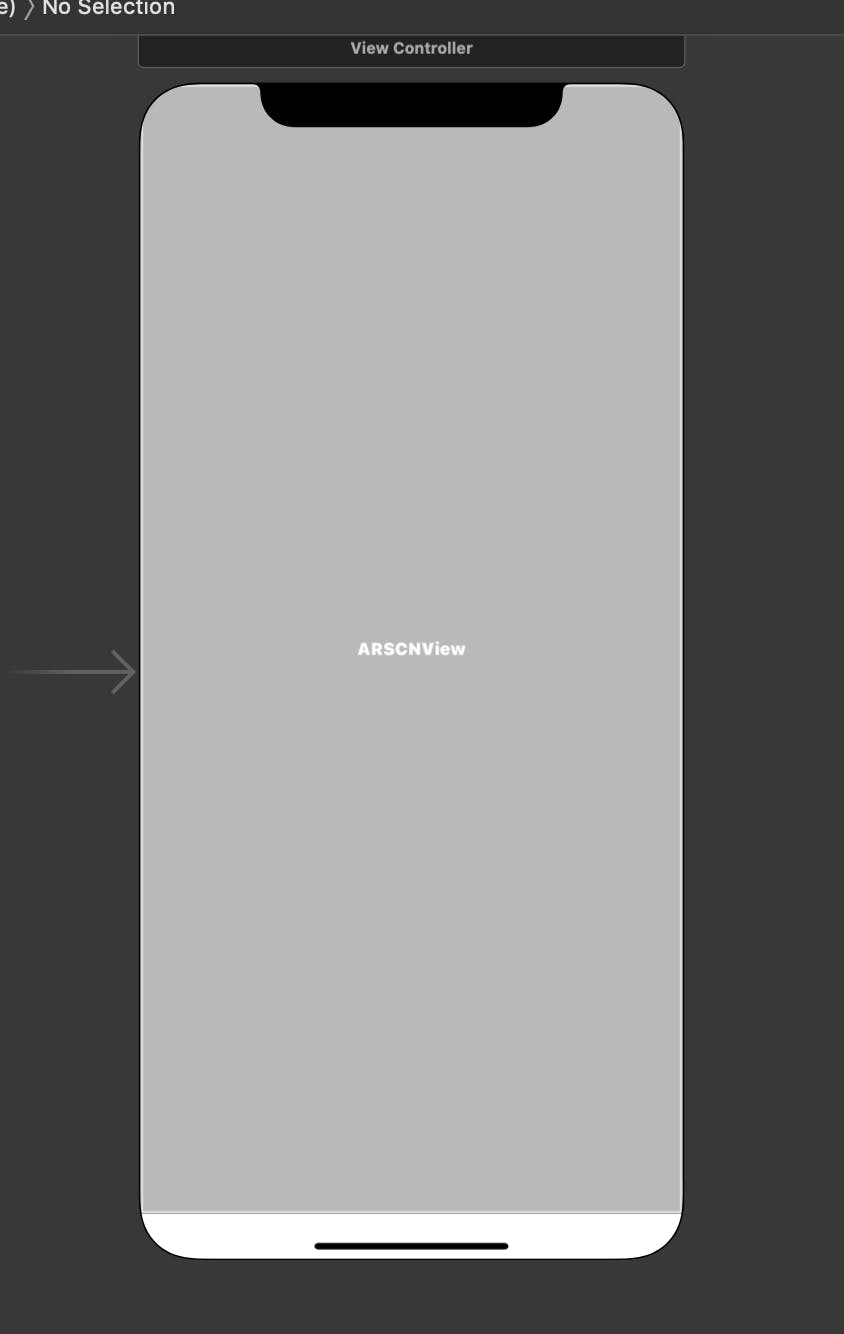
To start with lets create an AR App with scene kit technology and swift for language and storyboards as our interface. We will be manually adding any SwiftUI elements ourselves which we can add after we start the application. Starting off with the main story board, we see there is the AR Scene view.
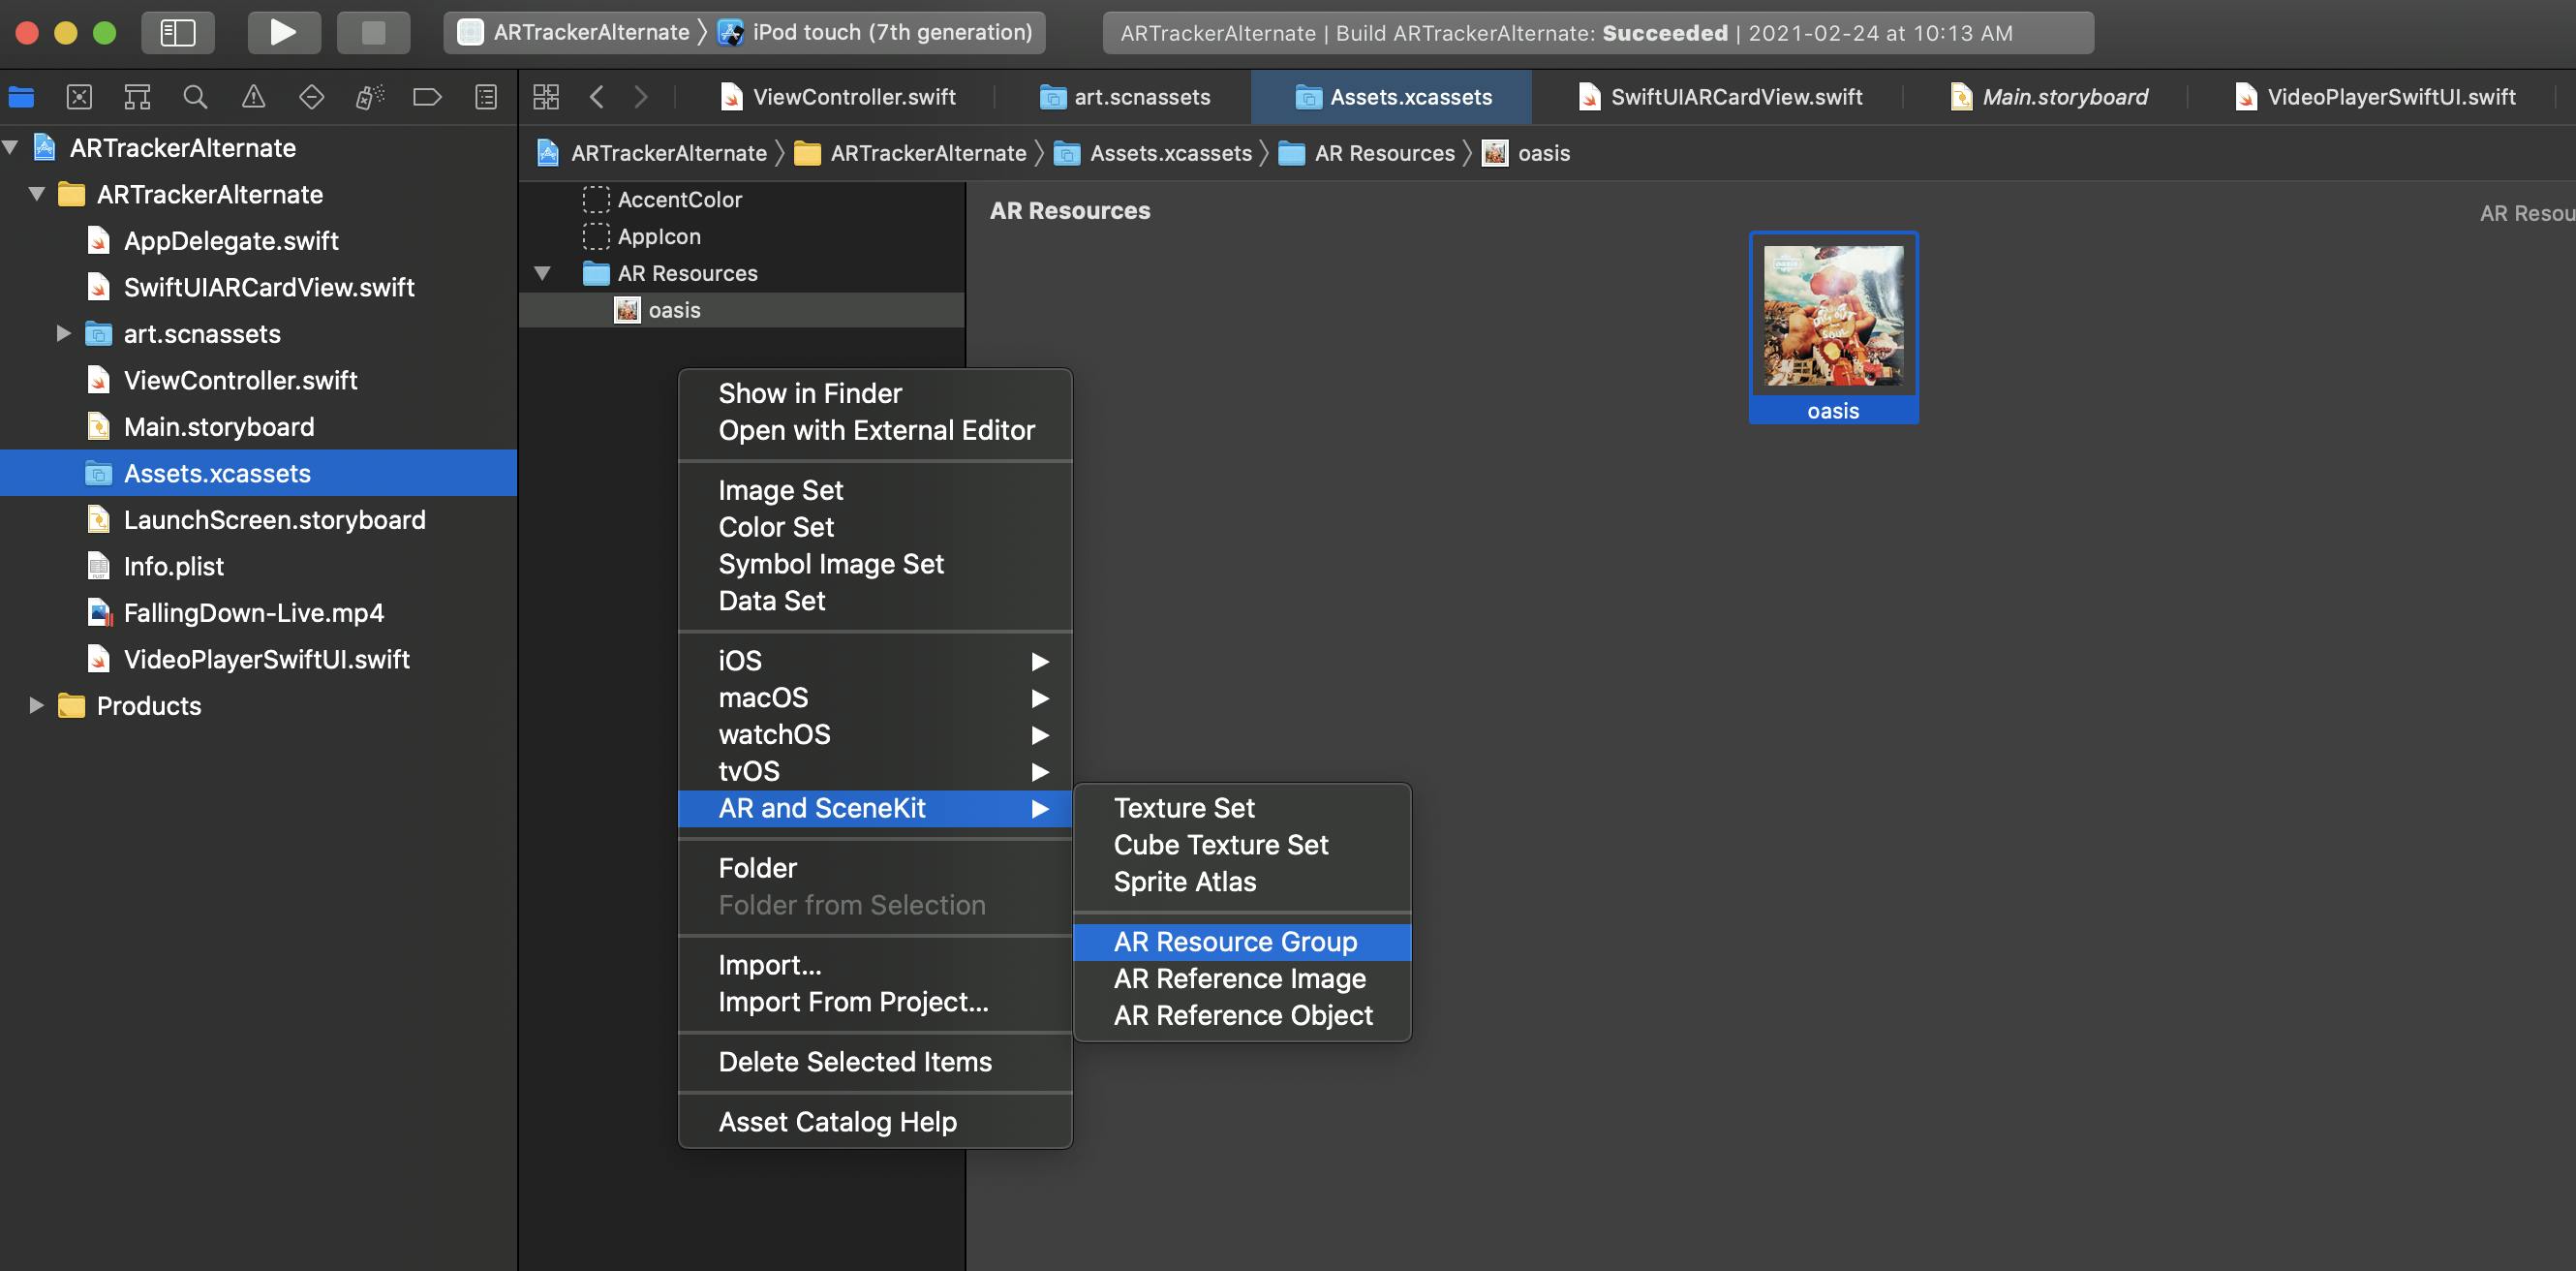
Now lets click into the Assets.xcassets and create a new AR Resource group with the images supplied as seen below. Oasis - Dig Out Your Soul Cover, captured with Google Photo scan. Also add in the the video you want to play anywhere in your library. In this example I will use the FallingDown-Life.mp4 but I will also how how to play a video from a url as well.
Now moving over to our view controller lets make the following modifications:
class ViewController: UIViewController, ARSCNViewDelegate {

    // comment out the original outlet and add the arView and loadView
    @IBOutlet var sceneView: ARSCNView!

    override func viewDidLoad() {
        super.viewDidLoad()

       // set the ar views delegate to self and set the scene as a SCNScene()
        sceneView.delegate = self
    }

    override func viewWillAppear(_ animated: Bool) {
        super.viewWillAppear(animated)

        // Create a session configuration
        let configuration = ARImageTrackingConfiguration()
        // set up the images to track to our AR Resource Group
        if let trackingImageRepo = ARReferenceImage.referenceImages(inGroupNamed: "AR Resources", bundle: Bundle.main) {
            // bind our AR Configuration to the tracking image repo and
            // tell the AR kit how many images we want to track. In this case 1
            // but we can track up to 100
            configuration.trackingImages = trackingImageRepo
            configuration.maximumNumberOfTrackedImages = 1

        }

        // Run the view's session
        sceneView.session.run(configuration)
    }

    override func viewWillDisappear(_ animated: Bool) {
        super.viewWillDisappear(animated)

        // Pause the view's session
        sceneView.session.pause()
    }
Inside our view will appear function we make sure to set up the Ar configuration object as an ARImageTrackingConfiguration() not the ARWorldTrackConfiguration() as we want to track specific images and not objects like faces. For this current Configuration we set the AR reference image to be the oasis album art added from before. Now set the scene view sessions to run our configuration and we can get moving to making the swift ui view we want to show the video in.
Now still inside the ViewController lets add our override to the renderer method that will give us access to the node inside the scene view where we can render our swift ui view onto.
 //Override to create and configure nodes for anchors added to the view's session.
    func renderer(_ renderer: SCNSceneRenderer, nodeFor anchor: ARAnchor) -> SCNNode? {
        let node = SCNNode()

        // case the found anchor as an image anchor
        guard let imageAnchor = anchor as? ARImageAnchor else { return nil }

        // get the name of the image from the image anchor
        guard let imageName = imageAnchor.name else { return nil }

        // now with the image name, make sure its the one we defined and then lets
        // add a node to the image
        if imageName == "oasis" {
            // create a planar geometry wiht the SCNPlane
            let plane = SCNPlane(width: imageAnchor.referenceImage.physicalSize.width, height: imageAnchor.referenceImage.physicalSize.height )

            // create a node on our plane
            let planeNode = SCNNode(geometry: plane)
            // ontop of our node, create a hosting controller where we will load up our swiftui view
            createHostingController(for: planeNode)

            // add our new planenode to the node from the image detection
            node.addChildNode(planeNode)
            return node
        } else {
            return nil
        }
    }
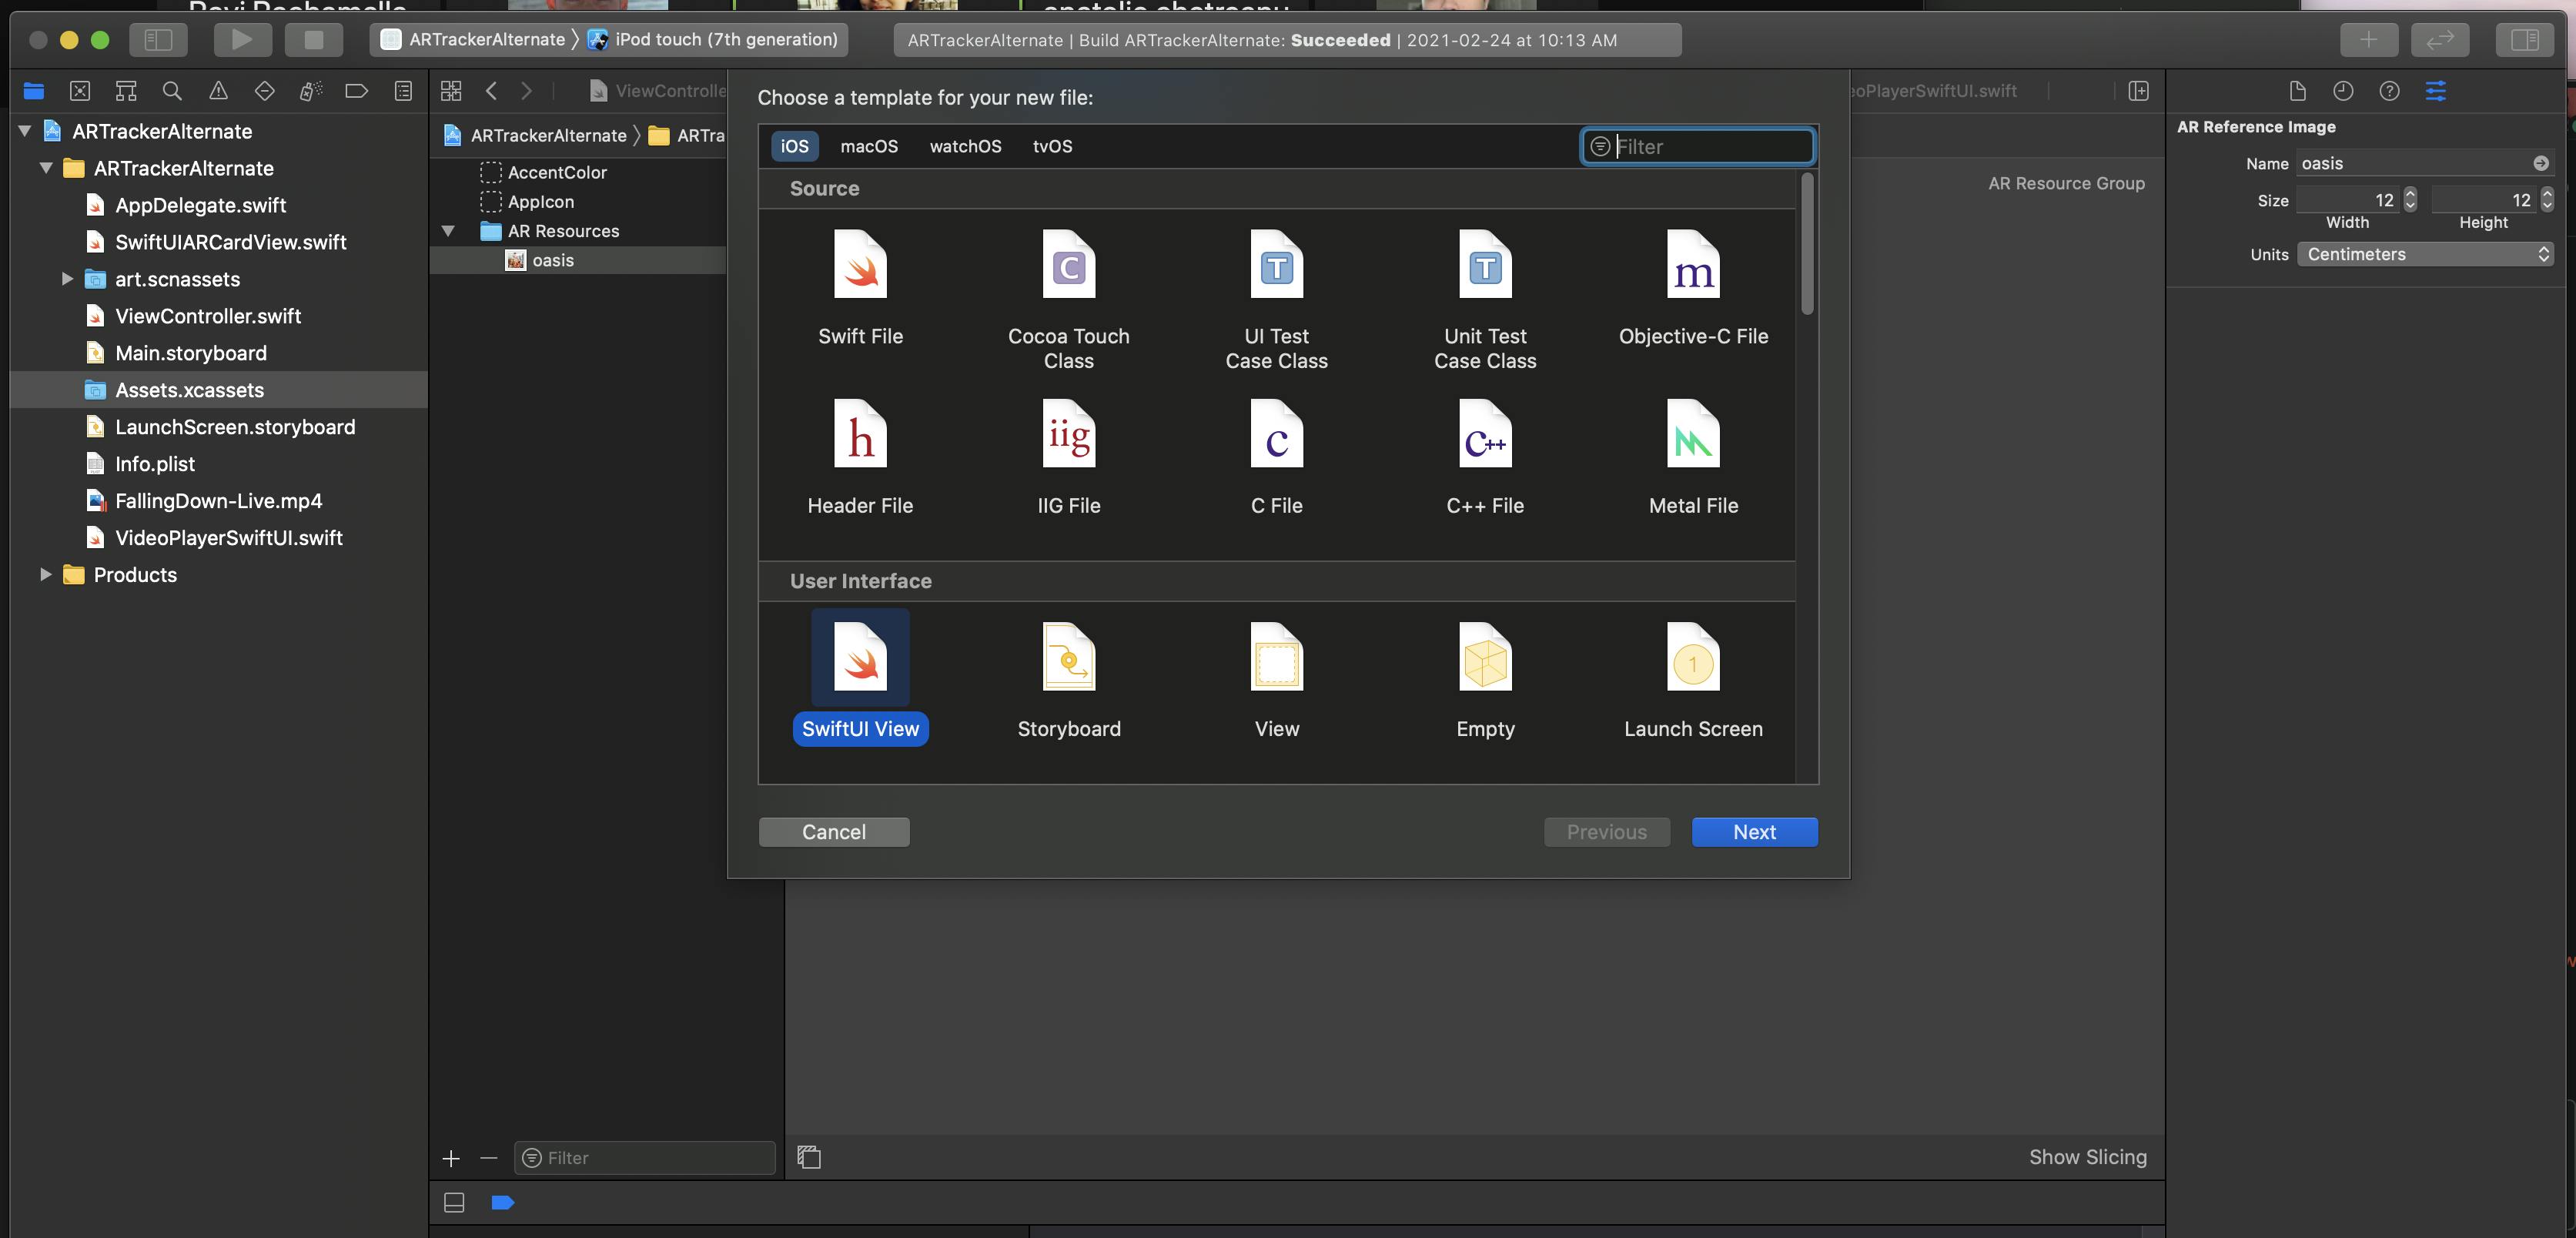
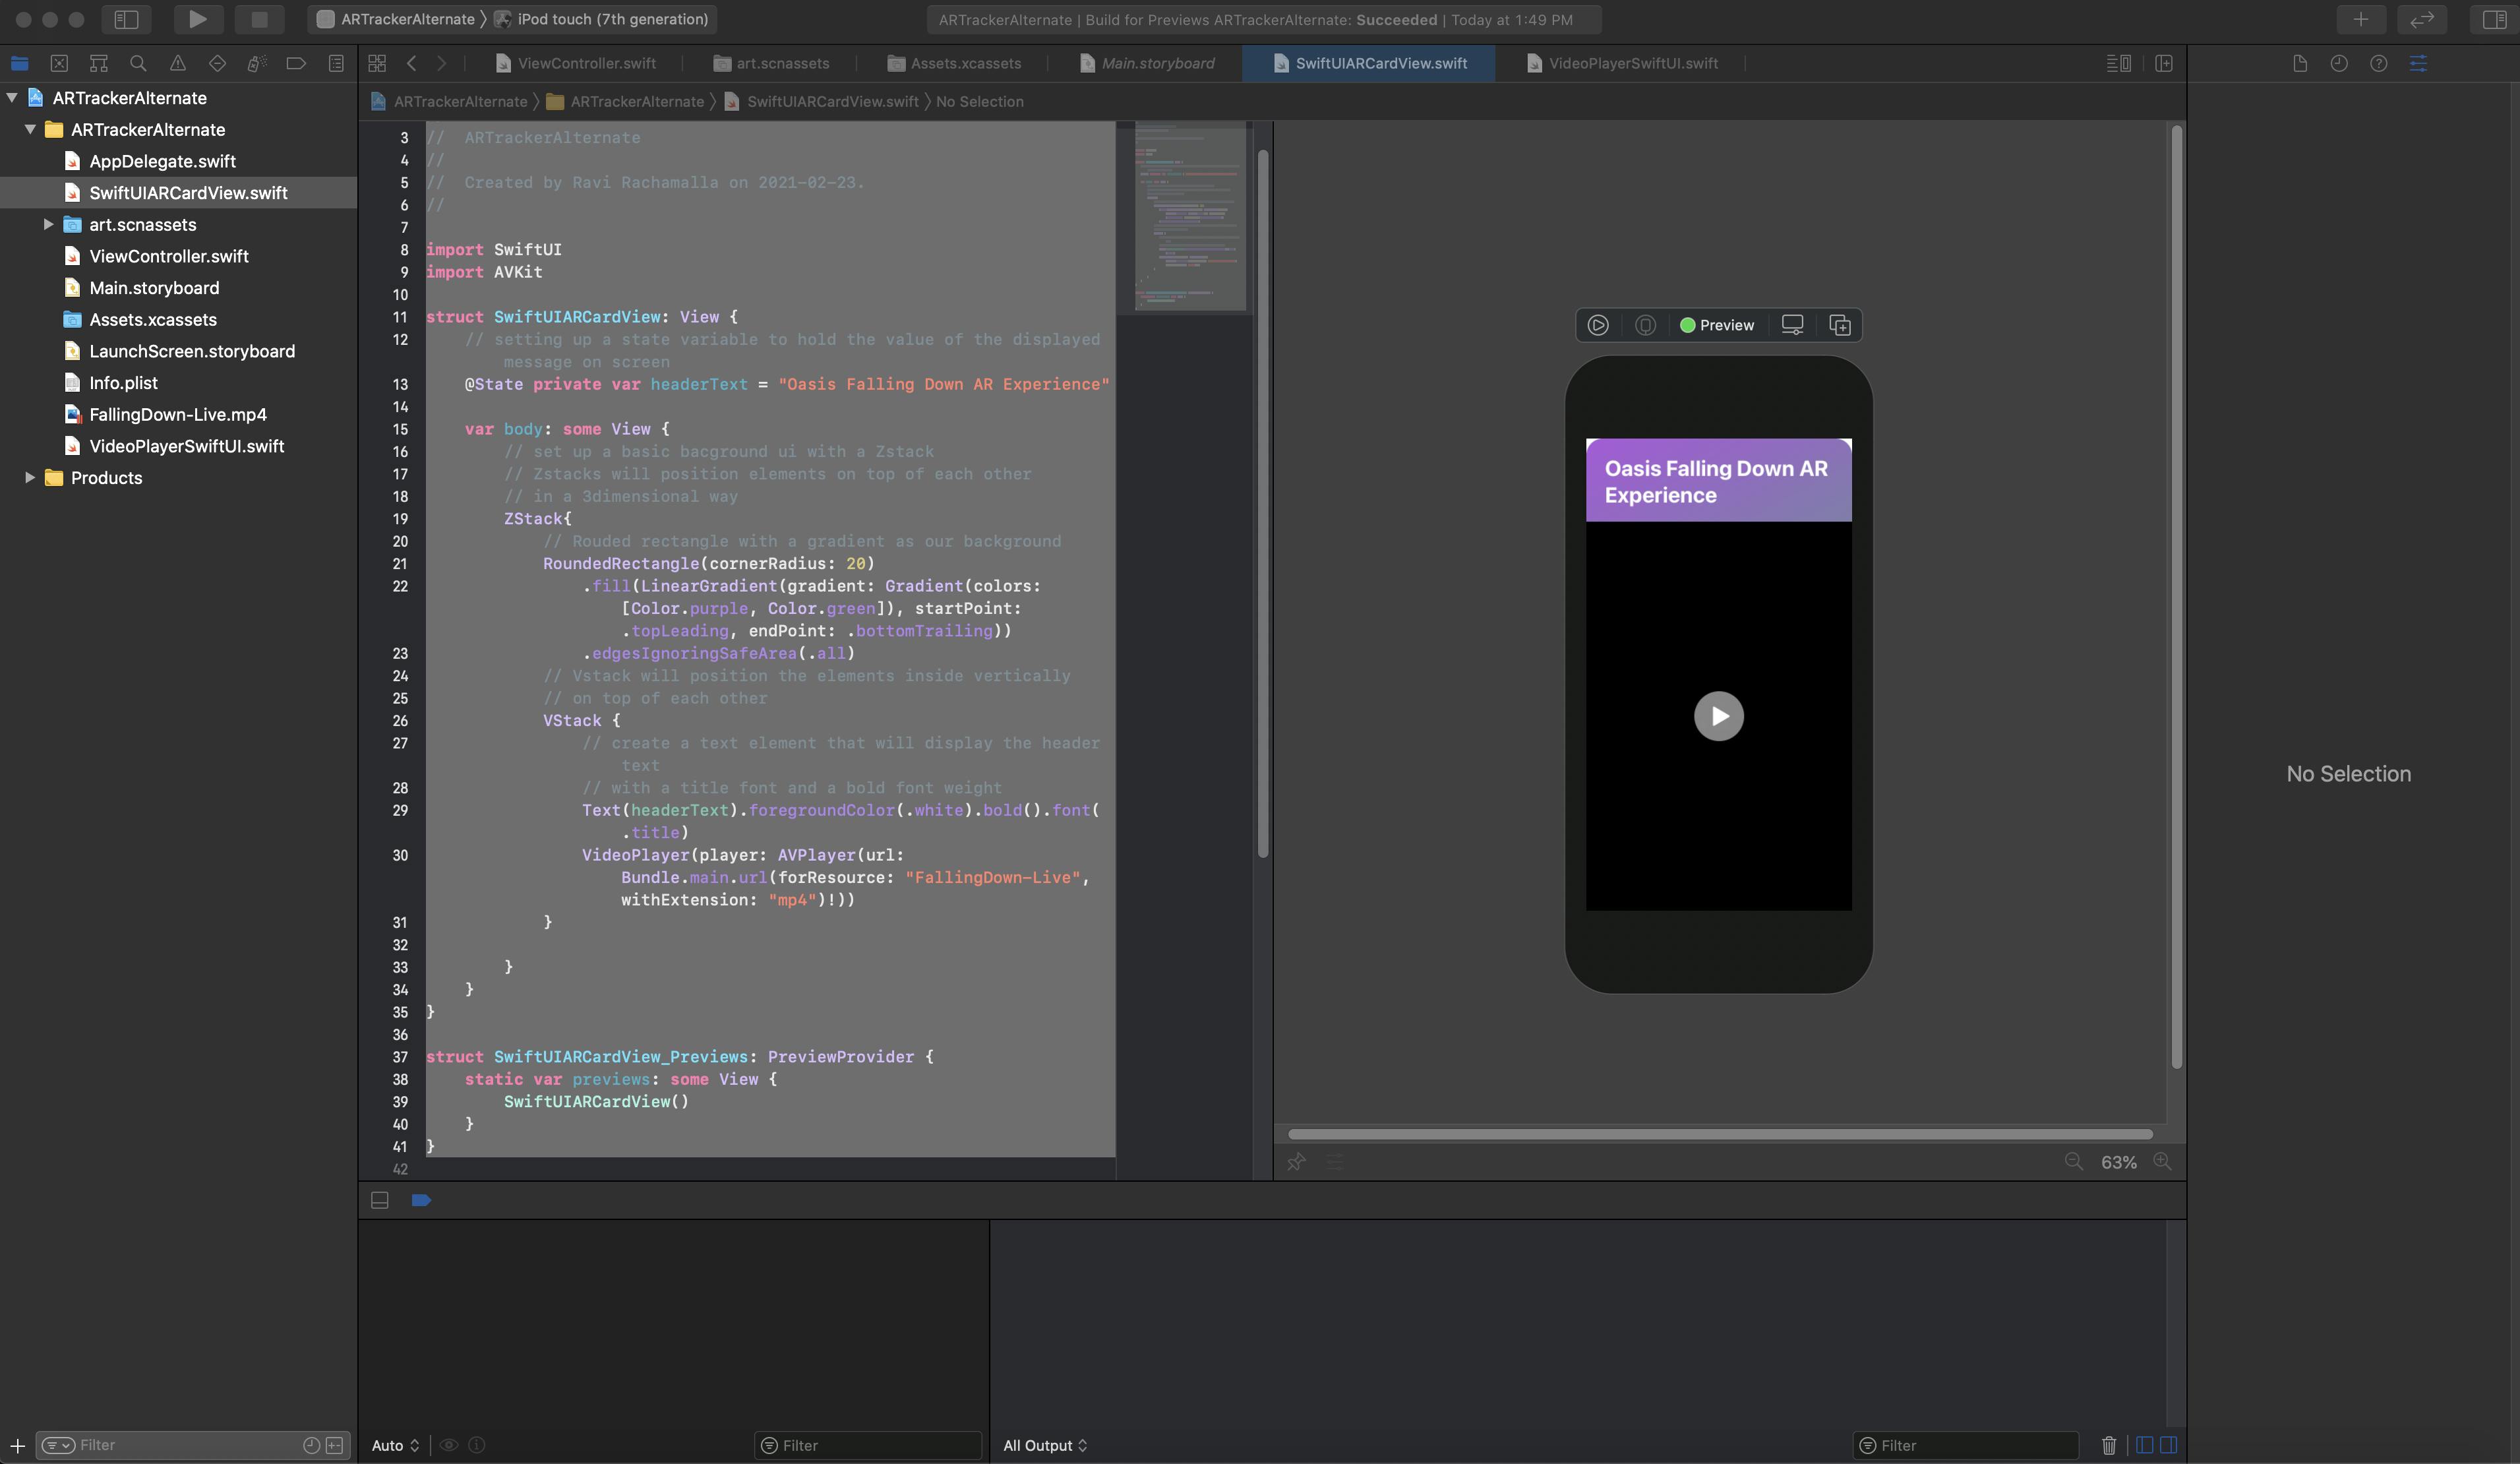
Add a new file to your project as seen below and select the Swift UI view and name it the SwiftUIARCardView
Inside our SwiftUI View add the following code. We will be using a background that is made up of a rounded rectangle that we use a gradient to fill in. Inside there we will display the title and then also the VideoPlayer that is linked to the FallingDown-Live.mp4 and will allow the user to press play to start the video
//
//  SwiftUIARCardView.swift
//  ARTrackerAlternate
//
//  Created by Ravi Rachamalla on 2021-02-23.
//

import SwiftUI
import AVKit

struct SwiftUIARCardView: View {
    // setting up a state variable to hold the value of the displayed message on screen
    @State private var headerText = "Oasis Falling Down AR Experience"

    var body: some View {
        // set up a basic bacground ui with a Zstack
        // Zstacks will position elements on top of each other
        // in a 3dimensional way
        ZStack{
            // Rouded rectangle with a gradient as our background
            RoundedRectangle(cornerRadius: 20)
                .fill(LinearGradient(gradient: Gradient(colors: [Color.purple, Color.green]), startPoint: .topLeading, endPoint: .bottomTrailing))
                .edgesIgnoringSafeArea(.all)
            // Vstack will position the elements inside vertically
            // on top of each other
            VStack {
                // create a text element that will display the header text
                // with a title font and a bold font weight
                Text(headerText).foregroundColor(.white).bold().font(.title)
                VideoPlayer(player: AVPlayer(url: URL(string: "https://www.youtube.com/watch?v=PJMOTbaVh44")!)).scaledToFill()
                // if you want to play a video from the library follow below
                // VideoPlayer(player: AVPlayer(url: Bundle.main.url(forResource: "FallingDown-Live", withExtension: "mp4")!)).scaledToFill()
            }

        }
    }
}

struct SwiftUIARCardView_Previews: PreviewProvider {
    static var previews: some View {
        SwiftUIARCardView()
    }
}
Now that we have a Swift UI view that can play our selected video lets go back to the View Controller and add 2 more methods needed to get this application working as we intend. The Create Hosting Controller function that will take the AR node from the scene view and render whatever view we ask it to. And the Show function that will take that hosting controller and display it inside the renderer method allowing us to view/ interact with the view inside the AR Scene View with the following code:
func createHostingController(for node: SCNNode) {
        // create a hosting controller with SwiftUI view
        let arVC = UIHostingController(rootView: SwiftUIARCardView())

        // Do this on the main thread
        DispatchQueue.main.async {
            arVC.willMove(toParent: self)
            // make the hosting VC a child to the main view controller
            self.addChild(arVC)

            // set the pixel size of the Card View
            arVC.view.frame = CGRect(x: 0, y: 0, width: 500, height: 500)

            // add the ar card view as a subview to the main view
            self.view.addSubview(arVC.view)

            // render the view on the plane geometry as a material
            self.show(hostingVC: arVC, on: node)
        }
    }

    func show(hostingVC: UIHostingController<SwiftUIARCardView>, on node: SCNNode) {
        // create a new material
        let material = SCNMaterial()

        // this allows the card to render transparent parts the right way
        hostingVC.view.isOpaque = false

        // set the diffuse of the material to the view of the Hosting View Controller
        material.diffuse.contents = hostingVC.view

        // Set the material to the geometry of the node (plane geometry)
        node.geometry?.materials = [material]

        hostingVC.view.backgroundColor = UIColor.clear
    }
Inside the createHostingController function we set the arVC (augmented reality view controller) to our newly made SwiftUIARCardView and then from there we set the configurations for how we want the object to appear. Once everything is added and connected together for the project you should end up with something like this:
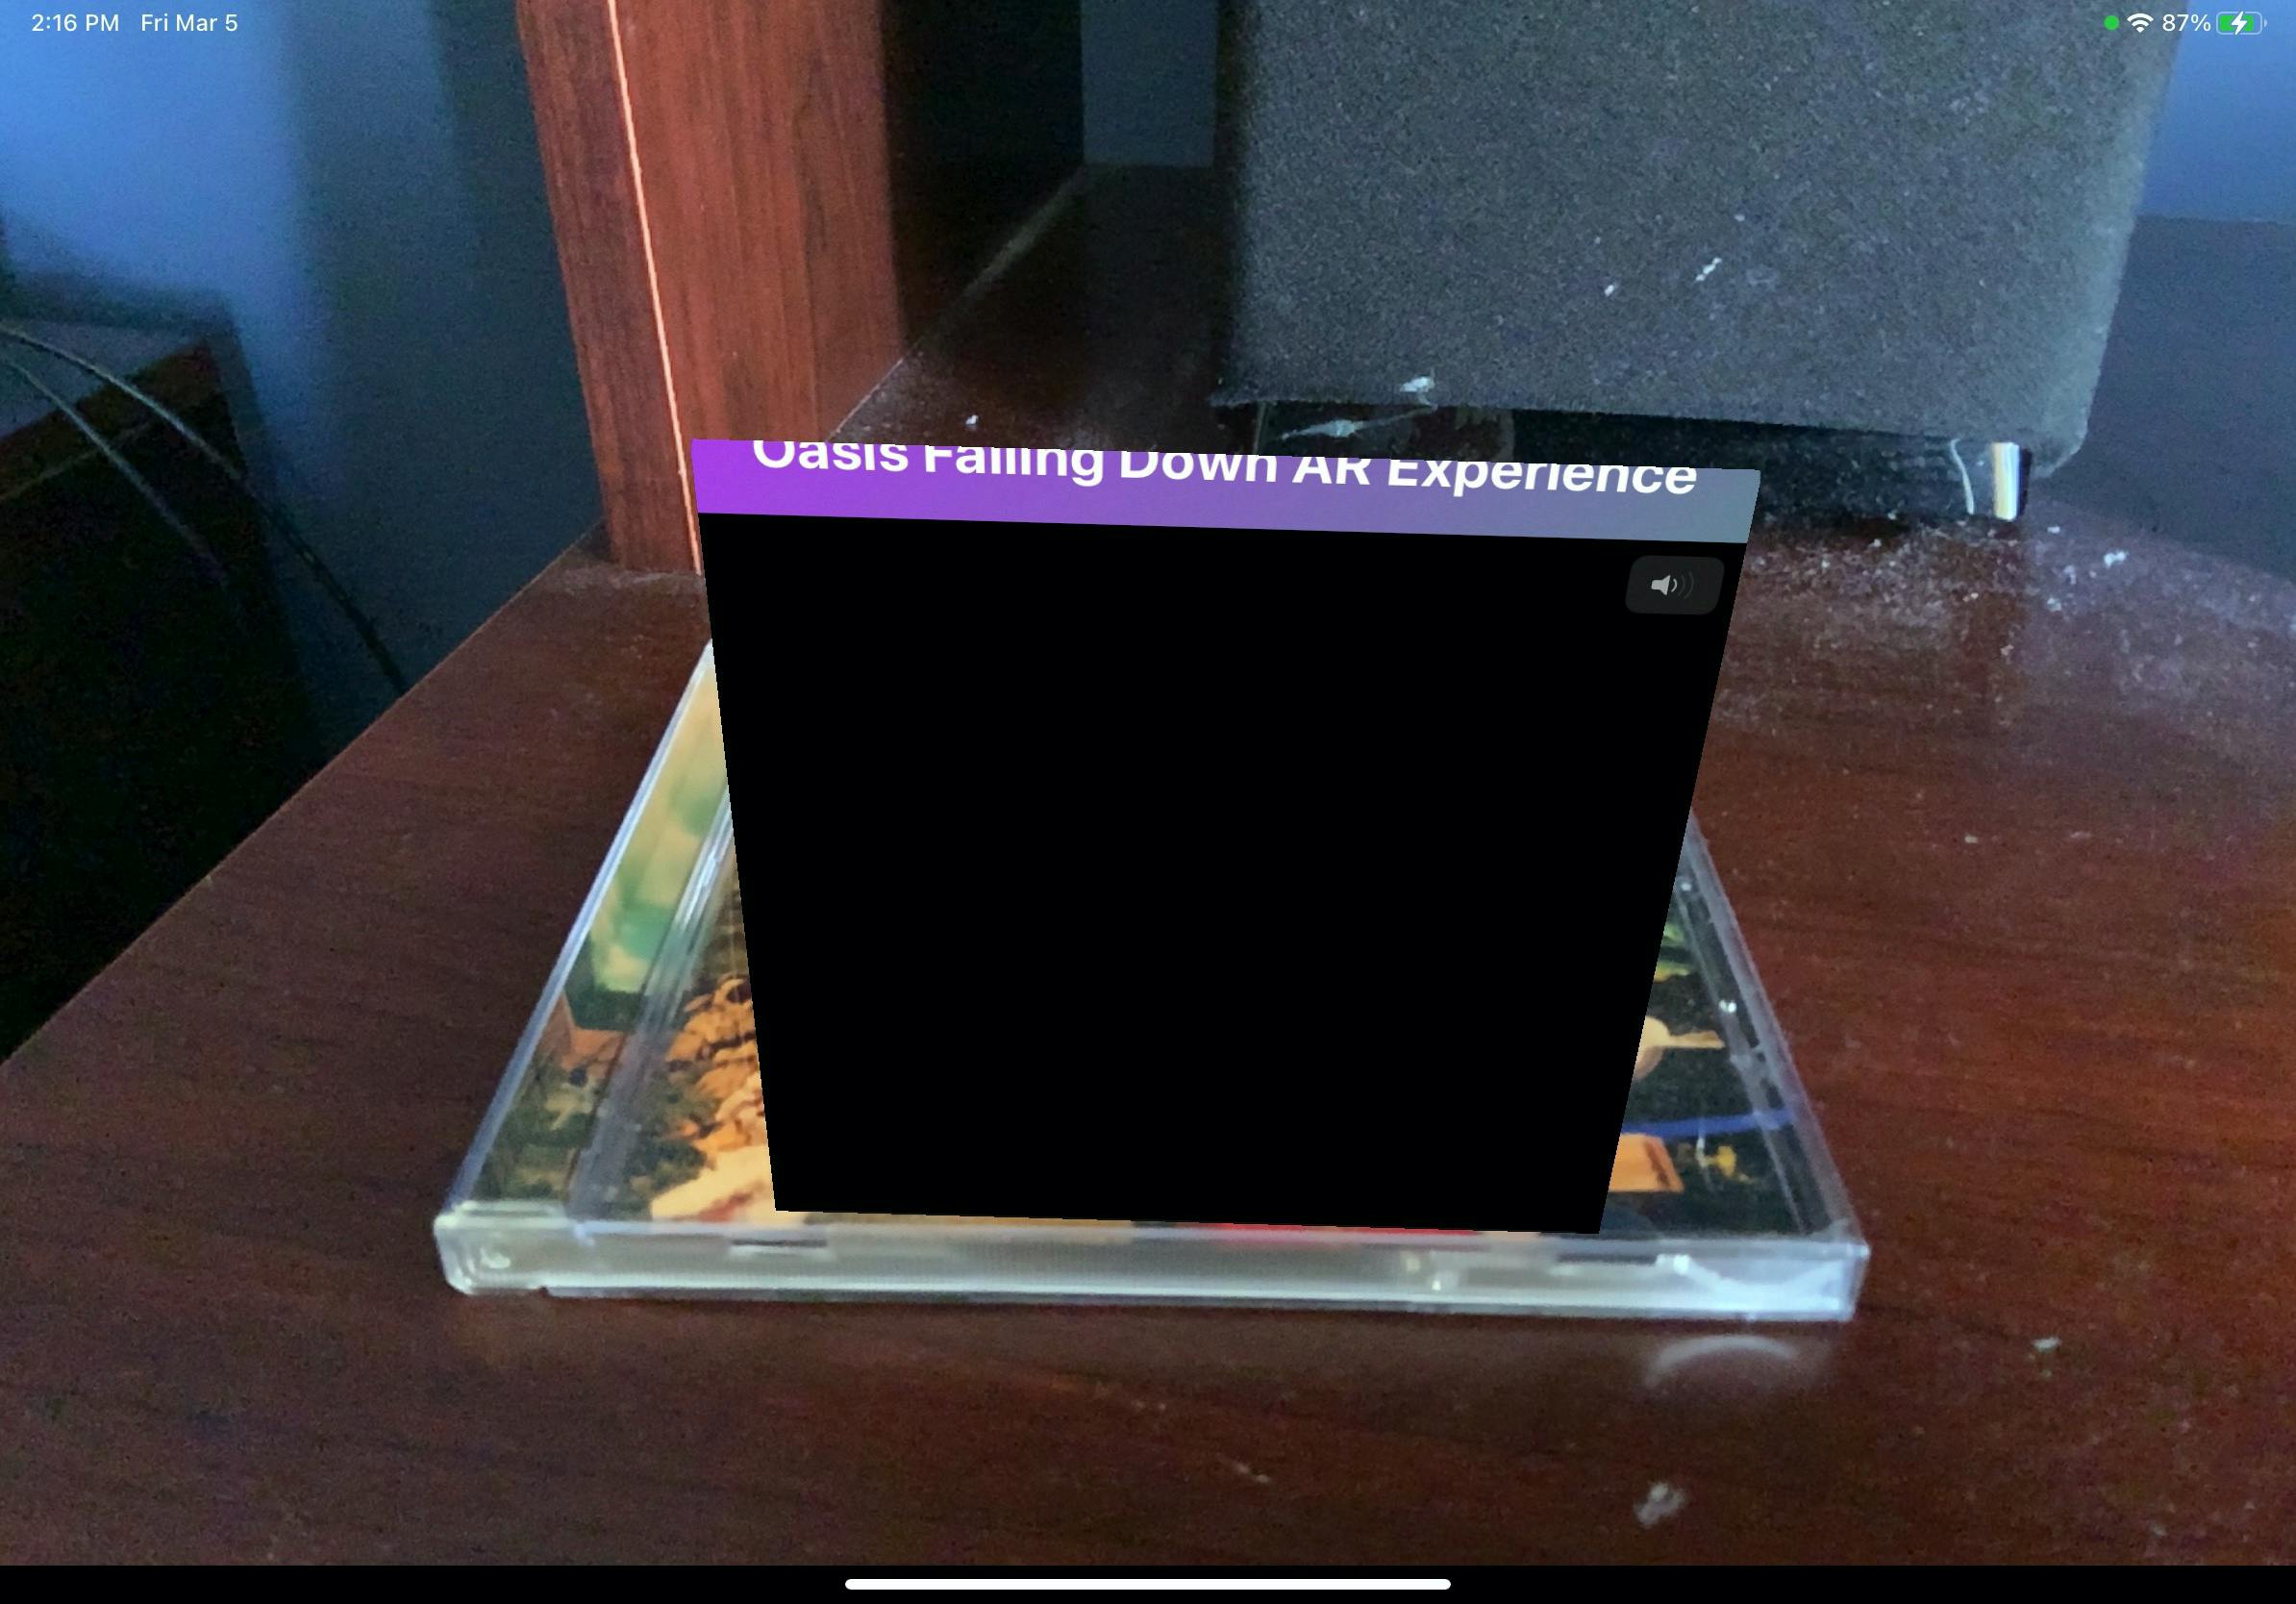
Image is not shown to avoid any copyright infractions.
Voila, and now you can play videos with swift UI in an AR view. Go out with this knowledge and think of something to change the world.